What if you could turn your blog into a video that grabs attention in seconds? In today’s fast-paced digital world, that’s not just a nice-to-have; it’s a smart move. Video content doesn’t just boost your SEO; it helps your message reach a wider audience, especially those who prefer visual or auditory learning.
Thanks to tools like Lumen5, converting your blog posts into videos is easier than ever. You don’t need video editing skills; just your written content and a few clicks.
In this guide, we’ll show you why video content is essential for your blog and how to convert your blog into a high-performing video, step by step. Let’s get started!
Table of Contents
Why Convert Blog Posts to Video?
Converting blog content into video format is a strategic move for several reasons:
- Boost Engagement: Videos grab attention better than plain text.
- Expand Reach: Videos work really well on social media and other online platforms.
- Content Variety: It’s great for people who learn better by watching and listening.
- Improve SEO: Helps improve your website’s SEO by adding different types of content.
What is Lumen5?
Lumen5 is a web-based, AI-powered platform that converts written content into professional videos. Accessible directly through your browser without any need to download software, Lumen5 uses natural language processing (NLP) to analyze text, automatically break it into slides, and pair it with relevant visuals to create a video. You can also easily customize the slides to match your style.
Key Features of Lumen5
- Blog to Video Conversion: Easily convert your blog posts into video by pasting text or a URL.
- AI Storyboarding: Automatically selects key sentences and pairs them with relevant visuals.
- Media Library: Get access to millions of free stock images and videos.
- AI Voiceover: Generate natural-sounding narration (with limited options on the free plan).
- Drag-and-Drop Editing: Customize slides with a user-friendly interface.
- Video Customization: Customize aspect ratios to fit landscape, square, or vertical video formats.
Lumen5 Plans Overview
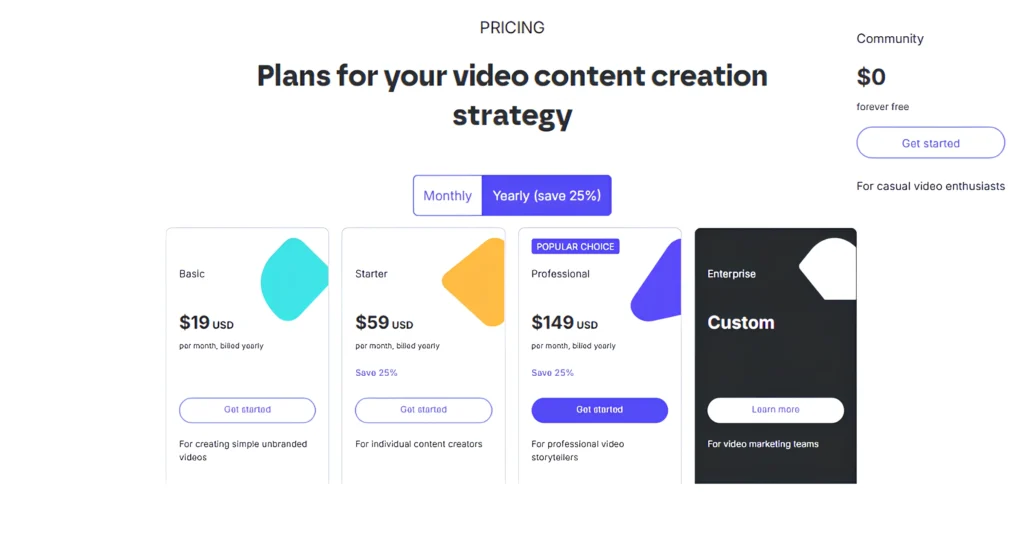
Lumen5 offers a free plan, plus paid tiers with additional features. Here’s a quick summary of what each plan includes.
Lumen5 Community (Free Plan)
- 5 videos per month
- Generate up to 2 minutes of long videos
- 720p resolution output
- One saved template and workspace
- Up to 2 minutes of free AI voiceover
- Access to landscape, square, and vertical formats
- Branded outro with a Lumen5 watermark
- Access to millions of free-to-use videos and images
- Basic audio track uploads and voiceover recording capability
Paid Plans (For Reference)
- Basic ($25/month):
- Removes Lumen5 watermark
- Unlimited video creation
- 20 minutes of AI voiceover
- Access to 30+ popular templates
- Automated captions
- Chat support
- Starter ($79/month):
- 50M stock photos and videos
- 1080p video resolution
- 60 minutes of AI voiceover
- Custom fonts and colors
- Unlimited premium media access
- One brand kit
- Professional ($199/month):
- 500M stock media options
- More templates
- 180 minutes of AI voiceover
- 3 brand kits
- Upload your own fonts
- Additional workspaces
- Enterprise:
- Fully customizable features
- Dedicated support
- Advanced collaboration tools
Annual payments generally offer a 25% discount.
How to Convert Blog Posts into Videos
Here is a simple step-by-step guide to convert blog posts into videos for free.
Step 1: Create and Log In to Your Lumen5 Account
- Visit the Lumen5 website.
- Create a free account and verify your email.
- Log in to your dashboard.
Step 2: Start Your First Video Project
- Click “New video” on your dashboard.
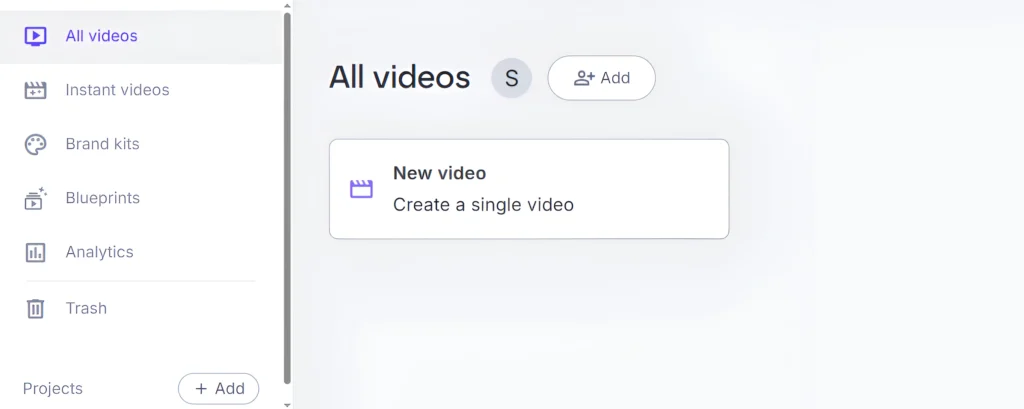
- Then choose any template you like, or else you can skip this part.
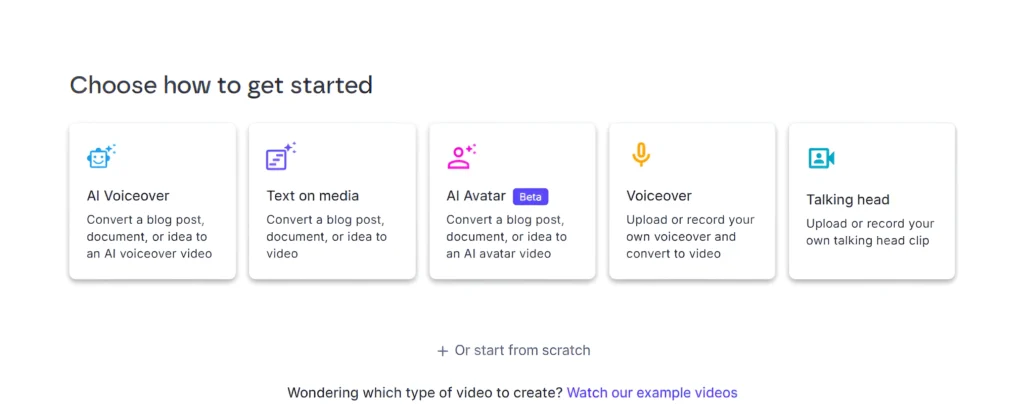
- Click “AI Voiceover” if you want the video with a voiceover, or “Text on Media” if you prefer the video without one.
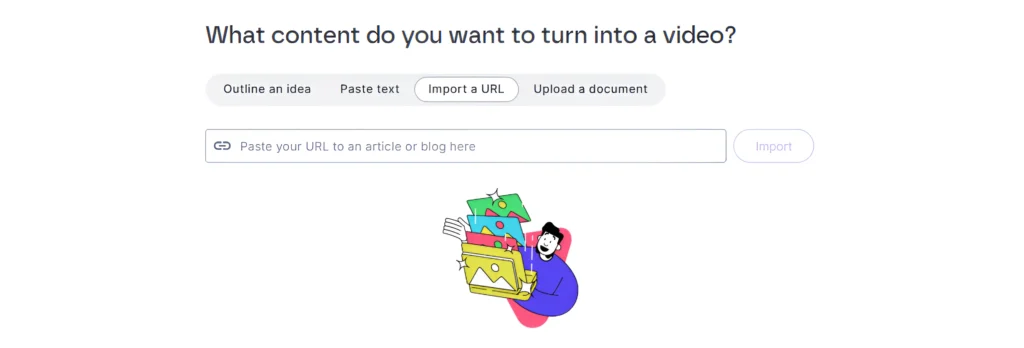
- Then, you can import your blog post using the following methods:
- Outline an idea: Upload an image, your video topic, and your outline to generate your video.
- Paste Text: Write or paste your content manually, and add the images if you don’t have a link.
- Import a URL: Add your blog post URL, and Lumen5 will pull the content for you.
- Upload a document: Upload a DOCX, PDF, or PPTX of your blog post.
- Once done, click on “Compose Script”.
- Then click on “Continue” and then on “Convert to video”.
I recommend using “Import URL” to easily import your blog content.
Now, just let Lumen5 do the rest. It will automatically convert your blog post into an engaging video for free.
Note: Lumen5 offers 2-minute video creation in the free plan.
Step 3: Review and Edit the AI-Generated Storyboard
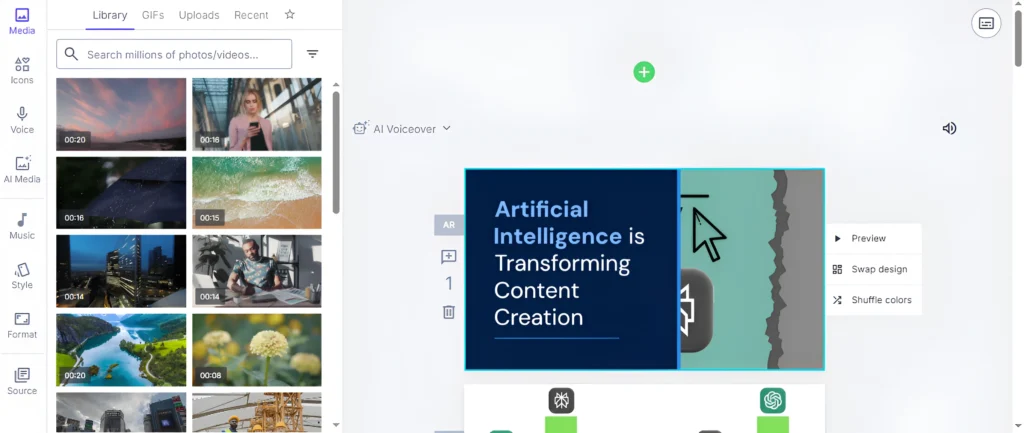
- AI Processing: Lumen5 automatically breaks your blog post into slides.
- Content Extraction: Key sentences are selected and paired with visuals.
- Storyboard Preview: Review the generated storyboard to ensure accuracy.
Step 4: Customize Your Video Content
- Edit Text: Modify the text on each slide for clarity and brevity.
- Rearrange Slides: Click, hold, and move the slides around to put them in the order you want.
- Adjust Formatting: Change fonts, sizes, and colors to match your brand.
- Replace Media: Swap the auto-selected images with alternatives if needed.
Step 5: Select and Optimize Media for Each Slide
- AI-Suggested Images: Use Lumen5’s suggestions.
- Search Alternatives: Use the media search panel for better matches.
- Upload Your Own: Mix your own photos or clips for a unique touch.
Best Practices:
- Use high-resolution images.
- Maintain consistent visual styles.
- Ensure images directly support the content.
Step 6: Add Voice-Over
- Custom Audio: Upload your own audio if preferred.
- Voiceover: Record a narration to complement the visuals, or use AI voiceover for free up to 2 minutes.
Step 7: Preview and Finalize Your Video
- Preview: Watch the entire video to check for smooth transitions and readability.
- Timing Adjustments: Modify slide durations as needed.
- Final Checks: Ensure text is legible and that transitions are seamless.
Step 8: Export Your Video
- Click “Publish” to start rendering.
- Select the output format (720p for the free plan).
- Download the final video.
Make sure to remove the outro section at the ending of your downloaded video.
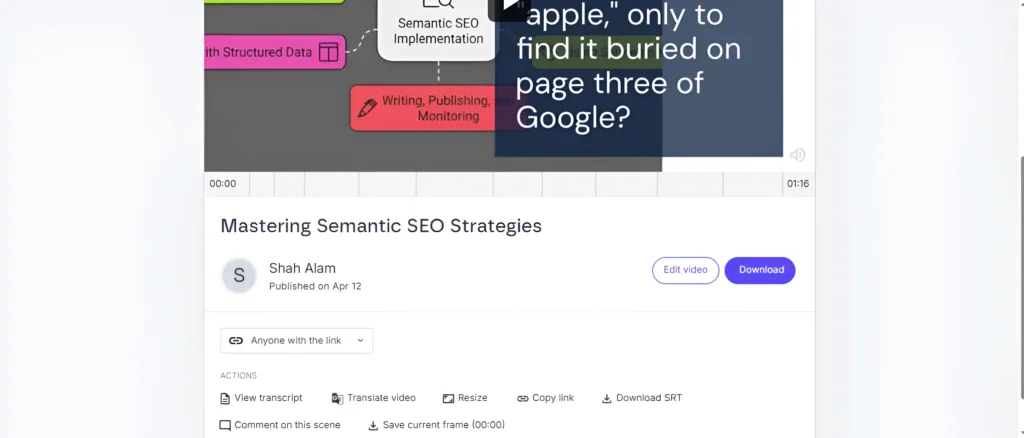
Final Video Results
Video 1
Video 1 explains why Semantic SEO is important for today’s content creators and marketers. Instead of just stuffing keywords, Semantic SEO focuses on understanding what people really mean when they search. This helps improve your search rankings, user experience, and engagement by delivering content that truly answers questions.
The video also introduces key concepts like natural language processing (NLP), knowledge graphs, and machine learning. You’ll get practical tips on using topic clusters, pillar pages, and semantic keywords to strengthen your content. Plus, it highlights powerful AI tools like ChatGPT, Semrush, Frase, and SEO.AI to help take your Semantic SEO strategy to the next level.
Video 2
Video 2 compares two powerful AI tools, Perplexity AI and ChatGPT, and explains their strengths in simple terms. Perplexity AI is great for research because it provides accurate, real-time answers with sources. ChatGPT, on the other hand, excels at creative tasks like writing stories, marketing copy, and casual conversations. The video helps you choose the right tool based on your needs. Factual accuracy or creative flow, or shows how using both together can boost your productivity.
Key difference
Main Topic:
- Video 1: Compares Perplexity AI and ChatGPT, exploring how they work and what they excel at.
- Video 2: Explains Semantic SEO, its importance, why it matters, and how to implement it.
Purpose:
- Video 1: Helps viewers choose the right AI tool based on their needs (accuracy or creativity).
- Video 2: Demonstrates how Semantic SEO can enhance content visibility in search engines.
AI Tool Role:
- Video 1: Focuses primarily on the two AI tools.
- Video 2: Briefly introduces AI tools as valuable resources for improving Semantic SEO.
Detail Level:
- Video 1: Provides an in-depth comparison between Perplexity AI and ChatGPT.
- Video 2: Outlines key concepts and actionable steps for implementing Semantic SEO.
Fun Fact: The video I used as an overview of my previous video “Start Building Apps Using Replit Agent With No Coding (Free)” is also generated by the Lumen5 free plan.
Tips for Using Lumen5
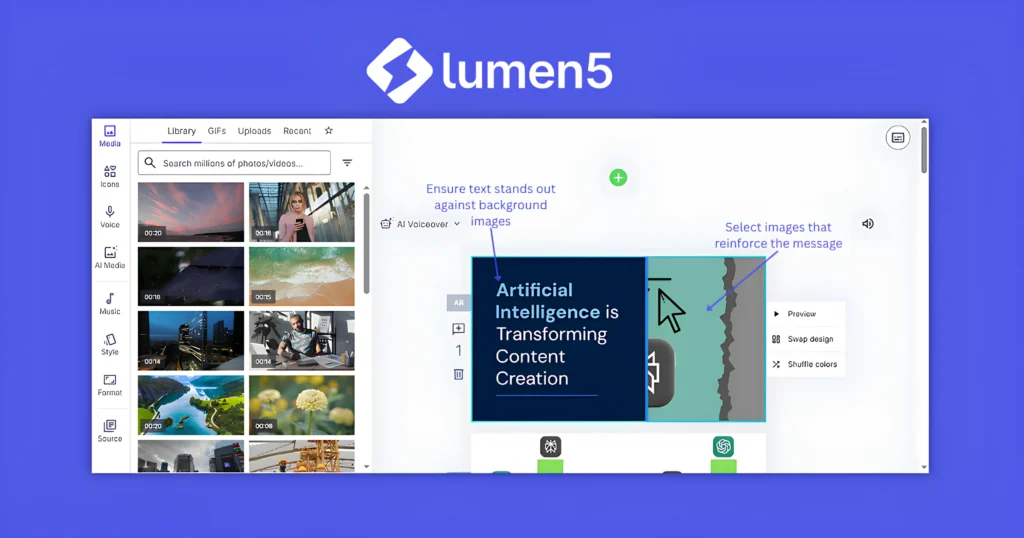
Optimizing Text Presentation
- Conciseness: Use short, impactful sentences.
- Contrast: Ensure text stands out against background images.
- Consistency: Maintain a uniform style across all slides.
- Emphasis: Make important points stand out by using bold text or bigger font sizes.
Maximizing Media Impact
- Relevance: Choose images that support the message.
- Visual Consistency: Use a consistent color scheme and style.
- Motion: Choose simple video clips that add motion without distracting from the main content.
- Simplicity: Keep backgrounds clear so the text stands out.
Working with Audio
- Matching Tone: Pick a background theme that fits the video’s vibe.
- Timing: Make slides last longer on key points to help viewers understand better.
- Voiceover: Think about adding a voiceover to walk viewers through the content.
Free Plan Limitations
- Watermark: As for the watermark, just remove the outro section added as a watermark from Lumen5.
- Resolution: The Free plan only allows you to create videos in 720p resolution. To make the most of this, use high contrast and larger text for better visibility.
- Template Constraints: Create a flexible template that you can easily update for different videos by changing the text, visuals, and other elements to match each topic.
Features of Lumen5 You Should Know

Instant videos
Lumen5 Instant Videos are automatically created using AI whenever a new blog post is published on a website connected to your Lumen5 account through an RSS feed. As soon as the post goes live, Lumen5 turns it into a short, engaging video. You’ll get an email when the video is ready, and you can choose which websites generate these videos by adjusting your RSS feed settings.
Automated Scene Selection
Lumen5’s AI automatically picks visuals that match your text using computer vision. It selects images, video clips, and background themes from its large media library, saving you time and making the process easier, especially when reusing older blog content. You can still make adjustments, but the AI usually does a great job, making it ideal for busy marketers.
Multilanguage support
Lumen5 supports over 35 languages, allowing you to create videos for global audiences. Although the platform is in English, it can handle video text, captions, translations, and voiceovers in languages such as Spanish, French, Chinese, and Hindi. Right-to-left languages are not yet supported. Enterprise users can automatically translate videos, but these translations may require a review. The platform also provides voiceovers in different accents, making it easier to localize your content.
Conclusion
Converting blog posts to videos using Lumen5’s free plan offers an accessible entry point into video content creation. This comprehensive guide has walked you through every step, from account setup and AI storyboarding to media selection and final export. By using Lumen5’s powerful features and following the advanced editing tips provided, you can create engaging videos that not only boost engagement and reach but also enhance your overall content strategy.
We recently built our SEO-optimised blog idea generator for free, so make sure to check it out.
FAQs
Q1. What is Lumen5?
Lumen5 is a web-based tool that uses AI to convert your blog posts into videos. There’s no need to install anything, it works directly in your browser. It identifies key points from your content to create a video, and you can easily customize the slides to match your style.
Q2. How many videos can I create per month with Lumen5’s free plan?
The free plan allows you to generate 5 videos per month, each up to 2 minutes long at 720p resolution, using one saved template and one workspace.
Q3. Can I remove the Lumen5 watermark on the free plan?
Yes, the watermark on Lumen5 is simply an outro clip added at the end of the video. To remove it, you just need to cut that part.
Q4. Which is the best free AI tool to convert blog posts into videos?
Lumen5 is the best free AI tool for converting your blog posts into videos. It uses AI to quickly turn your written content into engaging videos. The free plan lets you create 5 videos per month in 720p resolution and gives you access to millions of free stock videos and images, making it an easy and efficient way to create video content at no cost.
Q5. Can I convert a blog post into a video for free?
Yes, with Lumen5, you can easily convert your blog posts into videos for free. It offers a free plan that allows you to do this effortlessly.
Q6. How long can videos be on the Lumen5 free plan?
With the Lumen5 free plan, the maximum video length is 2 minutes. This duration is perfect for creating short, impactful content that keeps your videos engaging and easy to consume.
Q7. Can I use Lumen5 videos for YouTube or social media?
Yes, with Lumen5, you can upload your video to any social media platform, including YouTube. You can also choose the appropriate format based on the platform where you plan to share your video.
Q8. Is Lumen5 good for beginners?
Yes, Lumen5 is designed for users with no video editing experience. The platform’s AI storyboarding automatically breaks your blog post into slides and pairs them with relevant visuals, making the process easy even for beginners.
Q9. What are the limitations of the Lumen5 free plan?
Lumen5’s free plan has a few limits. Videos will have a Lumen5 outro watermark that you can’t remove unless you upgrade. The resolution is limited to 720p, so it’s a good idea to use big, high-contrast text for better readability. You can only save one template, so make sure it works for different video topics.
Q10. How to use Lumen5?
1) Sign up on the Lumen5 website and log in.
2) Click “New video” and choose a template.
3) Import your content by pasting text, adding your blog post URL, or uploading a document.
4) Click “Compose Script” to generate the script, then click “Convert to video.”
5) Review and edit the slides in the storyboard.
6) Click “Publish” to export the video.
7) Download your video.
Everything is very open and very clear explanation of issues. was truly information. Your website is very useful. Thanks for sharing.